Are you having trouble connecting to the Wi-Fi network on your Windows 11 PC or laptop? If so, then you’re in the right place. Many users are encountering issues related to the Wi-Fi network, while a few users reported that the Wi-Fi network is not showing up. This might be irritating for every user who uses their Windows 11 PC for online activities, such as browsing the internet, exploring social platforms, preparing presentations, watching web shows, and many more.
- Ways to Fix Wi-Fi Networks Not Showing Up on Windows 11
- 1. Restart Your Computer and Router
- 2. Toggle Airplane Mode
- 3. Disable and Re-Enable Wi-Fi Adapter
- 4. Run Network Troubleshooter
- 5. Update the Network Drivers
- 6. Reset Network Settings
- 7. Reset TCP/IP and Flush DNS Cache
- 8. Check for Windows Update
- Conclusion
The Wi-Fi network plays a crucial role in today’s digital world, allowing us to interact with many things related to interwebs and online activities. Without an improper Wi-Fi network, you can’t be able to access online platforms and web browsers anymore. Therefore, it is crucial to have a strong Wi-Fi network on your Windows 11 computer. Unfortunately, if the network isn’t showing up or you’re unable to connect with the network, don’t fret. In this guide, we will provide effective ways to solve the “Wi-Fi networks not showing up on Windows 11.” Let’s get started.
Ways to Fix Wi-Fi Networks Not Showing Up on Windows 11
Before we dive into the troubleshooting methods, ensure that the Wi-Fi option is enabled on your computer and your system is within the range of your Wi-Fi router. If you’re within the range and still are unable to connect with the connection or it’s not showing up, then you can follow the below methods to fix the problem. Let’s discuss them one by one.
1. Restart Your Computer and Router
Let’s start with the most basic and simplest method. At certain times, the Wi-Fi network is not showing up on your computer due to software conflicts and glitches. This usually prevents you from connecting your computer to the Wi-Fi network. In such a case, restart your Windows PC. Apart from that, you can restart your router as well to get it refreshed.
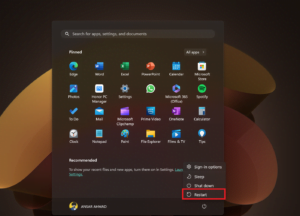
Here’s how you can restart your Windows 11 PC by following the steps below:
1. Press the Windows key on the keyboard to navigate to Start Menu.
2. Click on the Power button located at the bottom of the menu.
3. Then, click on the Restart option.
4. Now, your computer will automatically proceed to the restart process.
Once you restarted your Windows 11 PC or laptop then it’s time to restart your Wi-Fi router. Simply, detach the cable from the wall socket and then wait for a couple of minutes. Then, plug the power cable back to the wall socket and turn your router back on. Now, connect the network with your computer to check if the issue has been fixed.
2. Toggle Airplane Mode
Another effective method to solve the network related issues is to toggle Airplane mode on your Windows 11 PC or laptop. By enabling the Airplane mode, Windows will automatically disable the radio services including Wi-Fi network. This will refresh the network, allowing the network to run faster than before.
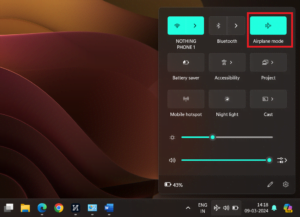
To toggle Airplane mode, press the Windows + A key simultaneously on the keyboard to navigate to the Quick Settings Panel. Here, you will see the Airplane Mode icon. Click on it to enable the Airplane Mode and then disable it back by clicking on it. This will refresh all the network connections on your computer.
3. Disable and Re-Enable Wi-Fi Adapter
A Wi-Fi adapter is a crucial component on the computer that allows us to connect to a nearby network. In some cases, temporary issues and glitches with the Wi-Fi adapter prevent the computer from showing up the Wi-Fi network. For such a case, you should disable and Re-enable the Wi-Fi adapter. It will help you in fixing the issue that you are having with the Wi-Fi network.
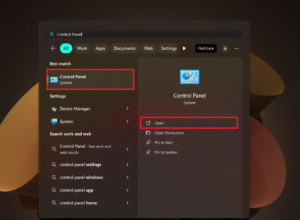
1. Press the Windows key to navigate to Start Menu.
2. In the search bar, type in “Control Panel” and click Open.
3. Under the Control Panel window, click on “Network and Sharing.”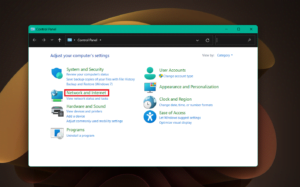
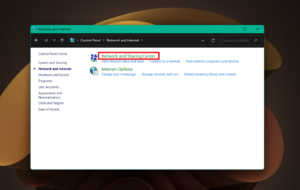
4. Then, click on “Network and Sharing Center.”
5. Choose “Change adapter settings” located on the left-hand side.
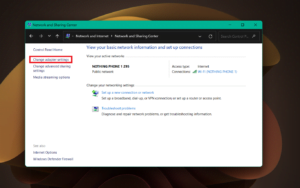
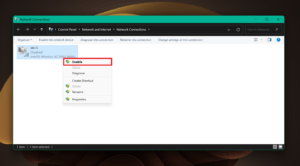
6. Right-click on the Wi-Fi adapter and choose “Disable.”
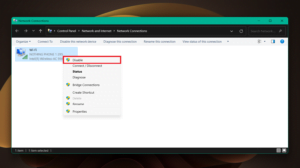
7. Wait for a moment and right-click on it back to select “Enable.”
4. Run Network Troubleshooter
Windows comes with an in-built option that lets you troubleshoot the issue by running it on your computer. If the Wi-Fi network is not showing up then ensure to run network troubleshooting and it will automatically fix the problem related to the network. Here’s how to do it.
1. Press Windows + I simultaneously on the keyboard to open Settings.
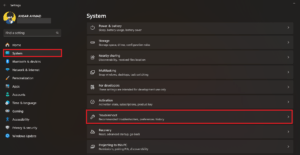
2. Click on the “System” and then click on the “Troubleshoot” option on the left side.
3. Under the Troubleshoot menu, click on “Other troubleshooters.”
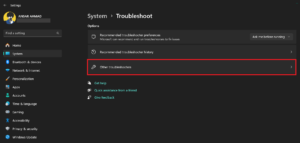
4. Here, you will find the “Network and Internet” option. Click on Run next to it.
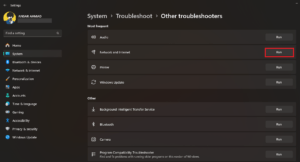
Once the network troubleshooter finishes, then a list of possible solutions will appear on the screen. Apply those solutions and it will fix the network related issues.
5. Update the Network Drivers
If still the network is not showing up on the Windows 11 PC or laptop then it could be due to outdated network drivers. Network drivers play a prominent role that allows your computer to stay compatible with all external network devices. These drivers come pre-installed on your Windows 11, where you can check and update these manually. Here’s how:
1. Press Windows + X simultaneously on the keyboard and then select “Device Manager.”
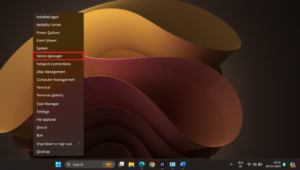
2. Expand the Network adapters by clicking on the arrow next to it.
3. Right-click on the dedicated Wi-Fi network driver and choose the “Update driver” option.
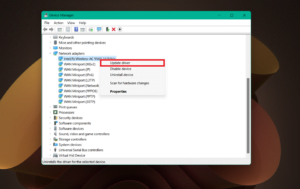
4. Then, click on the “Search automatically for drivers” option.
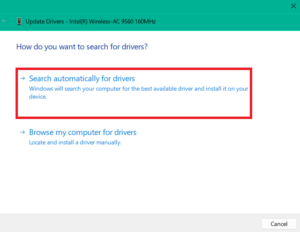
Now, Windows will automatically search for available updates related to your dedicated network driver. If any update is available on the screen then ensure to download it and then restart your computer to install it. After that, check whether your Wi-Fi network is showing or not.
6. Reset Network Settings
If you found the above methods unhelpful, it’s time to reset network settings on your Windows 11 computer. This will completely remove all network related components like drivers, network adapters, third-party VPN, etc. Apart from that, this method deletes any third-party applications or services that are interfering with your Windows 11 PC.
Here’s how to perform a network reset on the Windows 11 PC:
1. Press the Windows + I key on the keyboard simultaneously to open Settings.
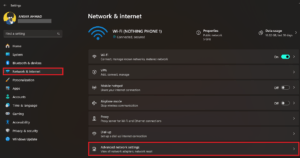
2. Click on “Network & Internet” and then select “Advanced network settings.”
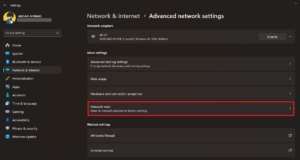
3. Under the More settings section, click on “Network reset.”
4. Finally, click on “Reset now” next to Network reset option.
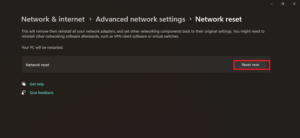
If any prompt appears on the screen, click on Yes to proceed further. Once finished, try connecting your Wi-Fi network to check whether the issue has been fixed or not.
7. Reset TCP/IP and Flush DNS Cache
TCP/IP (Transmission Control Protocol/Internet Protocol) allows your computer to communicate with other devices over the internet connection. But, if there is a incorrect settings or bugs seem then it won’t function correctly, resulting in the Wi-Fi not showing up issue. For such a case, you can reset TCP/IP and flush DNS cache to fix the problem. Here’s how to do it.
1. Press Windows key to navigate to Start Menu.
2. In the search bar, type “Command Prompt” and click “Run as administrator.”
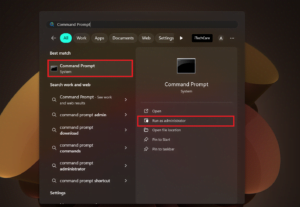
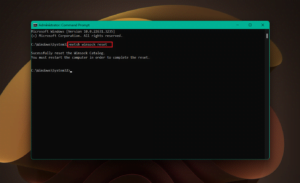
3. Type “netsh winsock reset” command and click enter to execute.
4. Then, type “netsh int ip reset” command and press Enter.
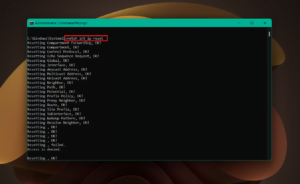
Once the command is executed then close it and then restart your computer. This will help you in flushing the DNS cache on the Windows 11.
8. Check for Windows Update
Last but not least, you should update your Windows software to the latest version. In certain cases, the bugs and glitches occur due to outdated software version, resulting in the Wi-Fi not showing up issue. Updating the system version to the latest one allows you to improve the overall performance and increases the efficiency. It fixes the glitches and issues, giving the smooth experience.
Therefore, if you’re still having issues with the Wi-Fi network or unable to connect with the network, then make sure to update the Windows software to the latest version. To check for Windows update, follow the steps below:
1. Press Windows + I key together on the keyboard to open Settings.
2. Click on “Windows Update” on the left-hand side.
3. Then, click “Check for updates.”
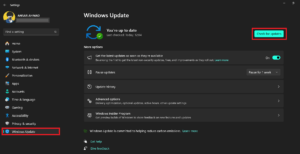
4. If an update is available, download it by following the screen prompt.
5. Once the download is finished, then restart the computer to apply the changes.
Note: Before you proceed, make sure you have enough battery charge. At least 50% charge is required to avoid update stuck or other errors while installing it. Plus, ensure you’re connected with a stable internet data when downloading the update.
Conclusion
That’s it; this is how you can troubleshoot and fix the Wi-Fi not showing up issue on the Windows 11 PC. However, it’s common to encounter network related issues on the Windows 11, but with the right solution, you can easily get back to access your network again. We hope you have found the above methods helpful to you in fixing the Wi-Fi not showing up on Windows 11. If you have any queries or thoughts related to this, do let us know in the comments section.
You can follow us on X (Formally Twitter) and on Instagram to keep updated with us and the latest tech.
Also Read-How to Fix ‘This App Isn’t Compatible with the Latest Version of Android’ Error in Android 14

