In the past few years, Windows 11 brought many customization options that allow users to change the overall look of their desktop by changing themes, colors, cursor size, and more. If you are new to Windows 11, then you should take a step to customize the overall look by changing the mouse cursor, size, themes, and style. The mouse cursor comes up with the default in Windows computers, but you can customize the cursor accordingly.
Therefore, if you are bored with the default mouse cursor looks, then you may need to change its look by changing the style, color, and themes. This will give a significant look while browsing internet, creating documents, etc. In this guide, we will show you two different ways to change mouse cursor size, theme, and style in Windows 11.
Ways to Change Cursor Size, Theme, and Style in Windows 11
Customizing the mouse cursor size, theme, and style is a good take, particularly when you want to change the overall look of your computer to make it appealing.
Below, we have shared two different ways to change cursor, size theme, and style in Windows. Let’s look at them.
1. Customize Mouse Cursor Using Windows Settings
If you want to customize the mouse cursor size, color, and themes then you can do it by using the Windows Settings. Follow the below steps to customize the mouse cursor in Windows 11:
- Press the Windows + I key together on the keyboard to open the Settings app.
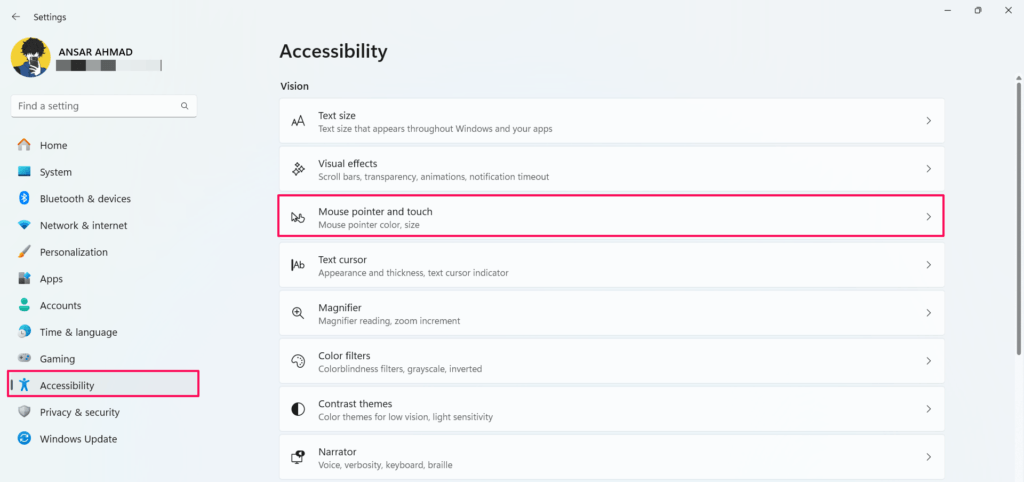
- Click on “Accessibility” on the left side bar.
- Then, click on the “Mouse pointer and touch” option on the right side.
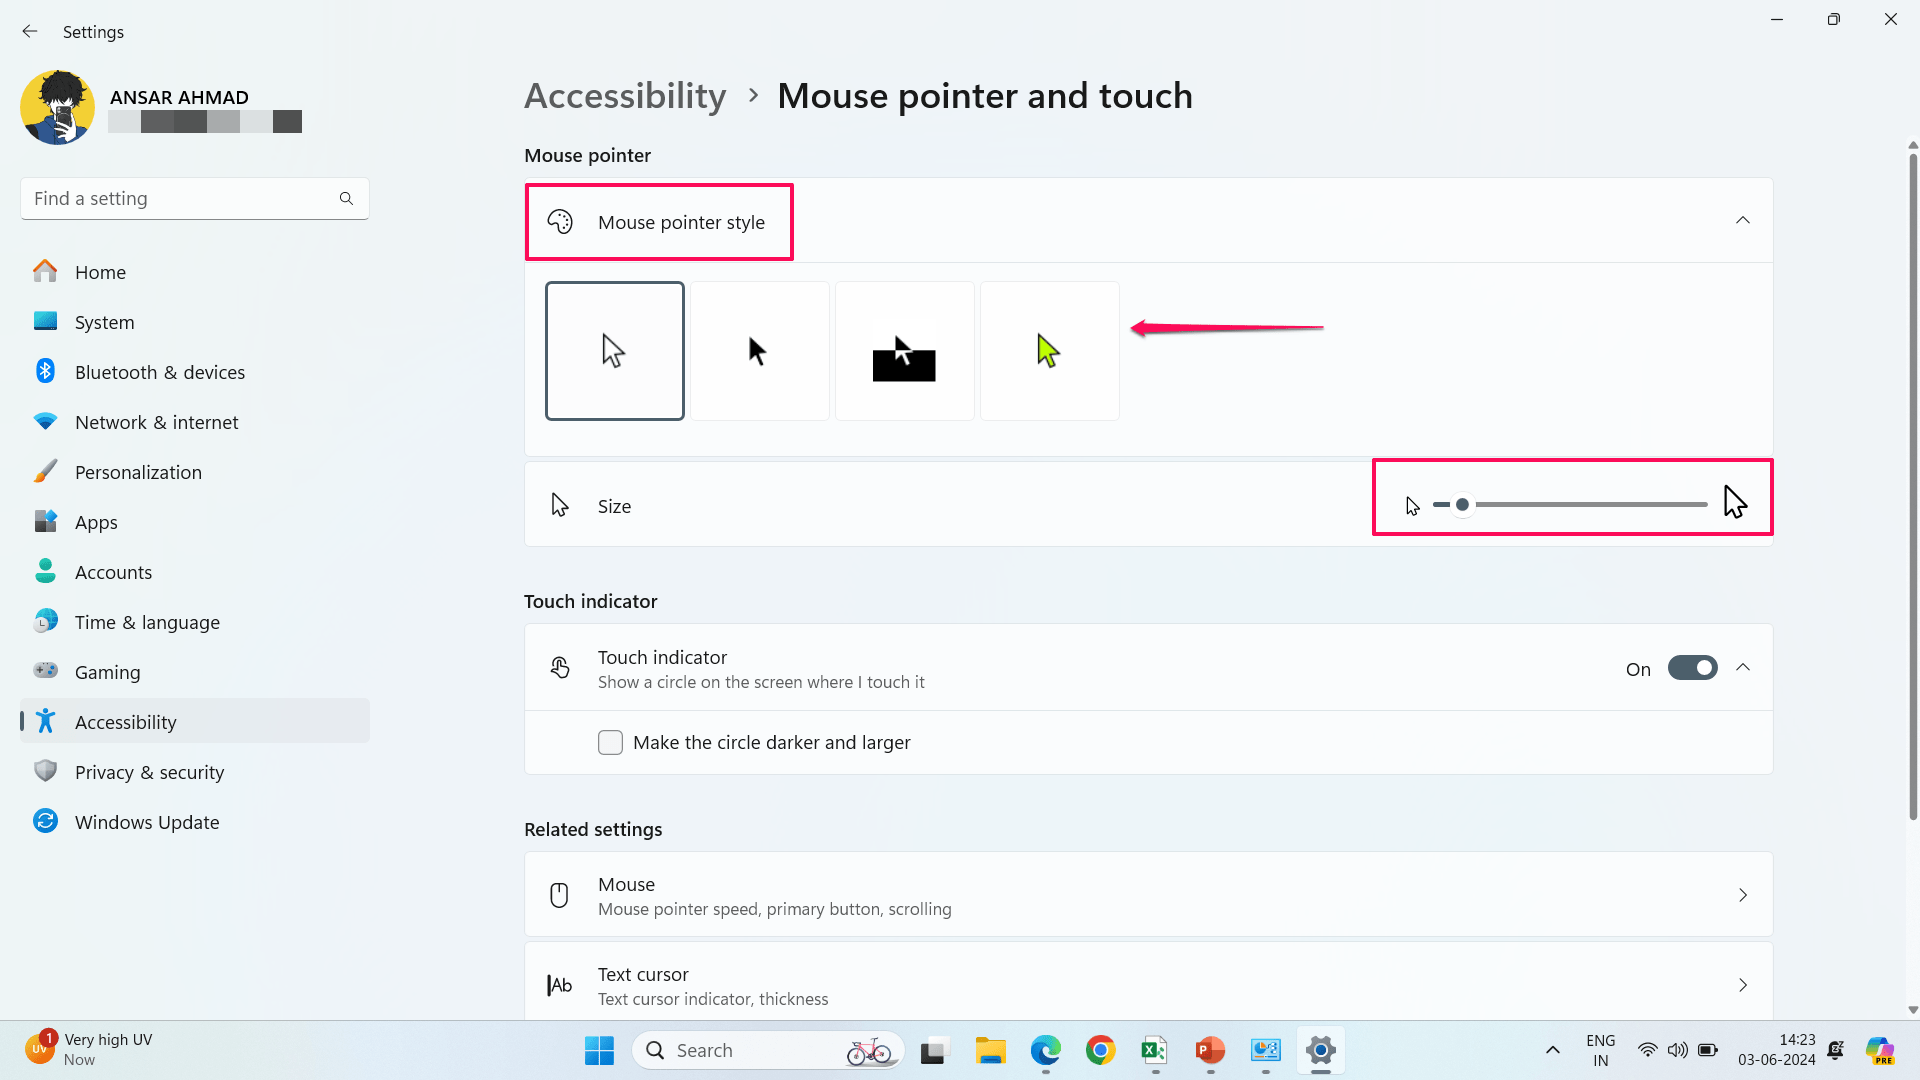
- Under the Mouse pointer and touch section, select the cursor style you prefer in the Mouse pointer style.
- You can change the cursor color by selecting another mouse pointer style rather than default.
- To change the cursor size, drag the size slider to the right or left side to increase or decrease the size.
2. Change Mouse Cursor Using Control Panel
Another easiest way to change the mouse cursor is by using the control panel. Control Panel can be utilized for various purposes including mouse cursor customization. So, if you want to change the cursor color, size then you can use the Control Panel for that.
Here’s how to customize mouse cursor with Control Panel on Windows 11:
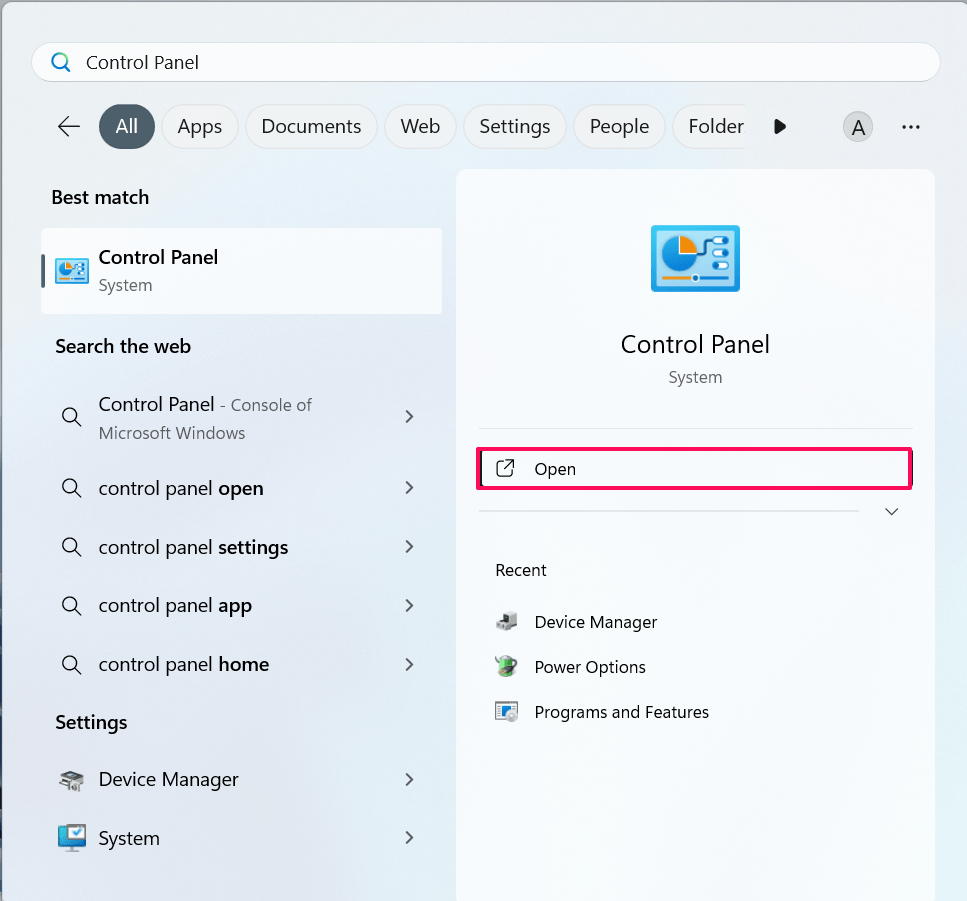
- Launch the Start Menu by pressing the Windows key on the keyboard.
- In the search menu, type in “Control Panel” and click Open.
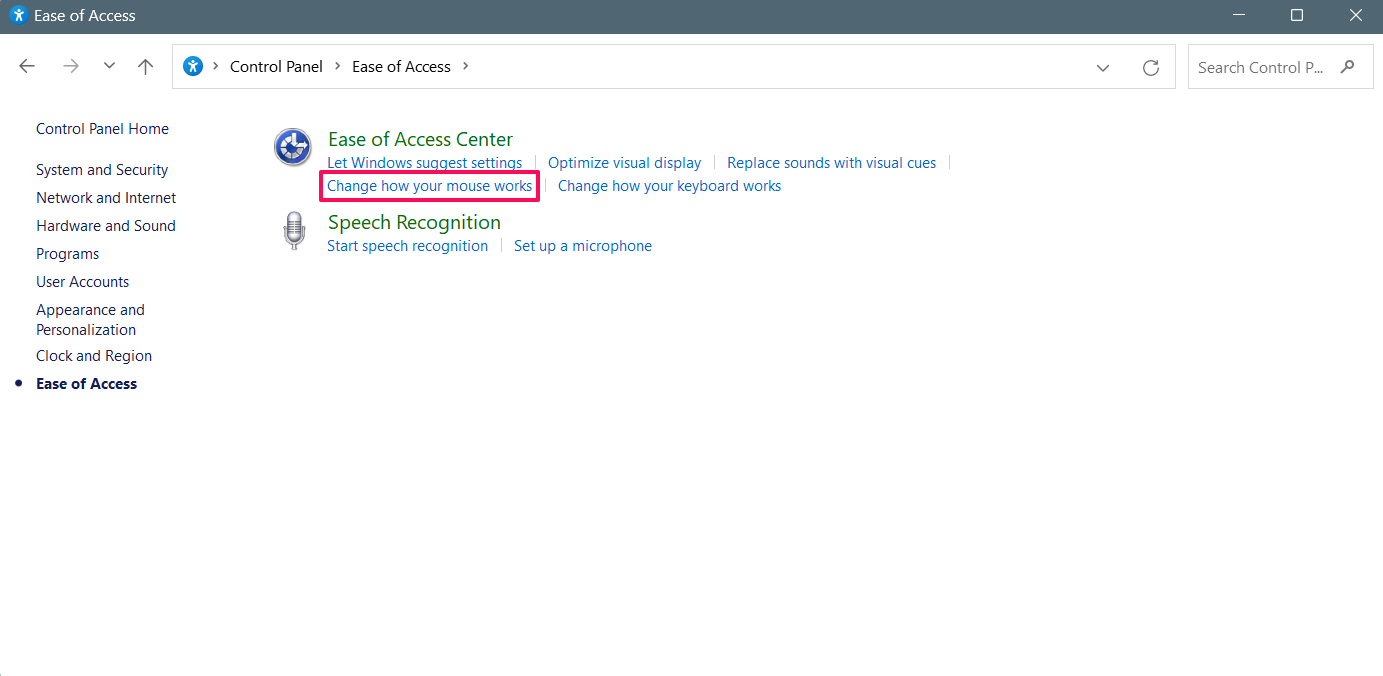
- Click on the “Ease of Access” in the control panel window.

- Then, click the “Change how your mouse works” option in the Ease of Access section.
- Here, you will see different mouse pointer styles including white, black, and colors.
- Choose the mouse pointer size and color you prefer on the screen.
- Lastly, click on the Apply button and select OK to save changes.
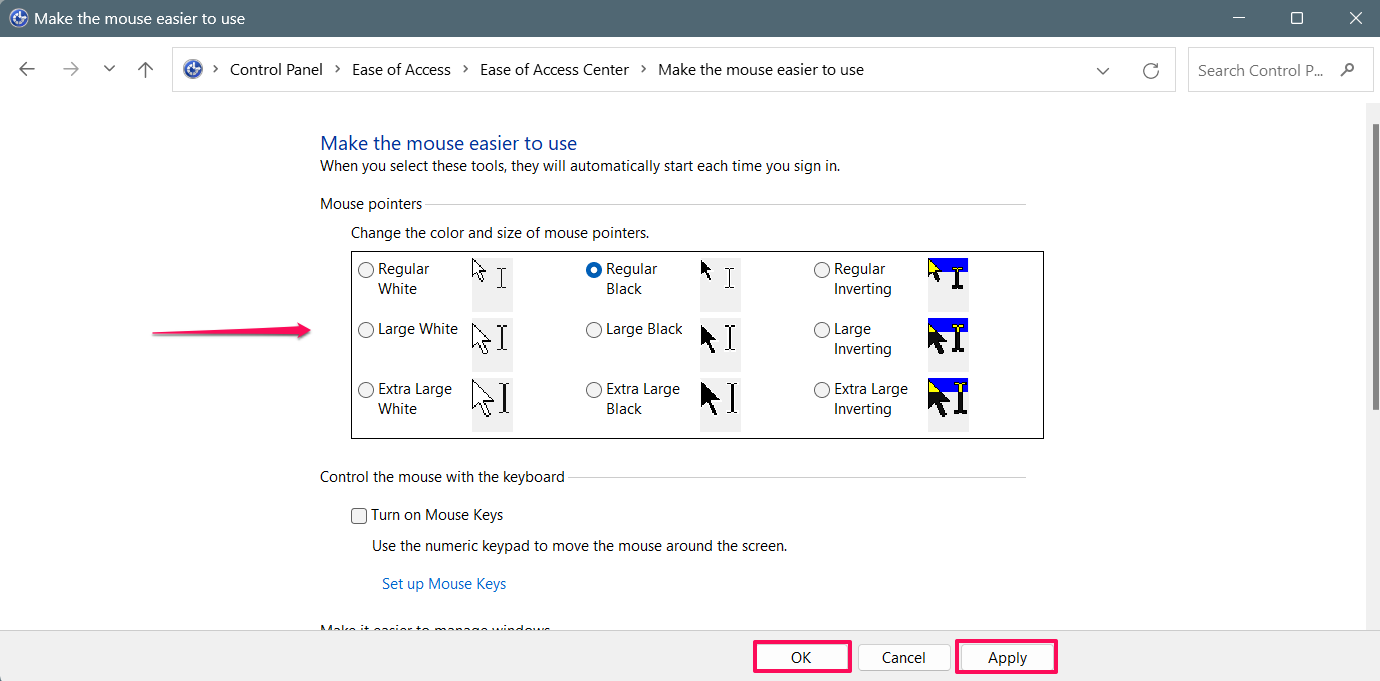
Now you may notice that the mouse cursor is changed to your selected size, color, and style. If you want to change the cursor back to the default, you should select “Regular White” in the Mouse pointers section.
How to Customize the Text Cursor in Windows 11
Now you may know how to customize the mouse cursor size, color, and style in the Windows computer. If you want to change the text cursor color and size, then you can do the same. Here’s how to do it.
- Press the Windows + I key together on the keyboard to open the Settings app.
- Click on “Accessibility” on the left side bar.
- Then, click the “Text cursor” option on the right side.
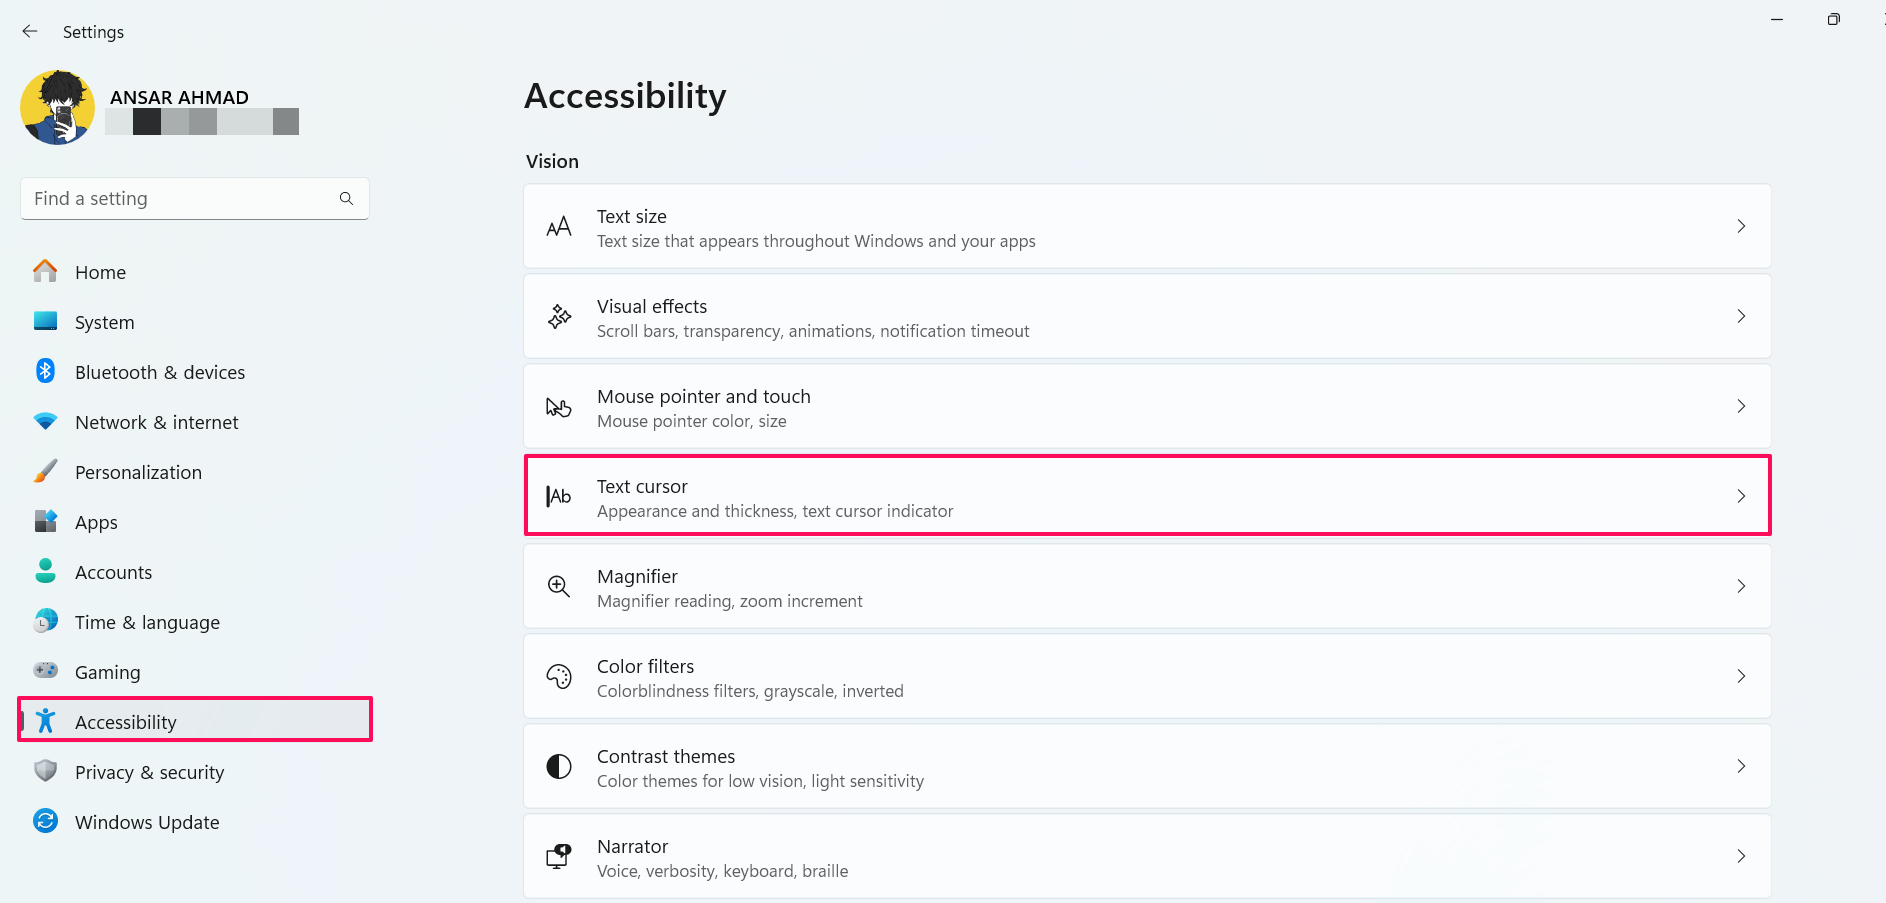
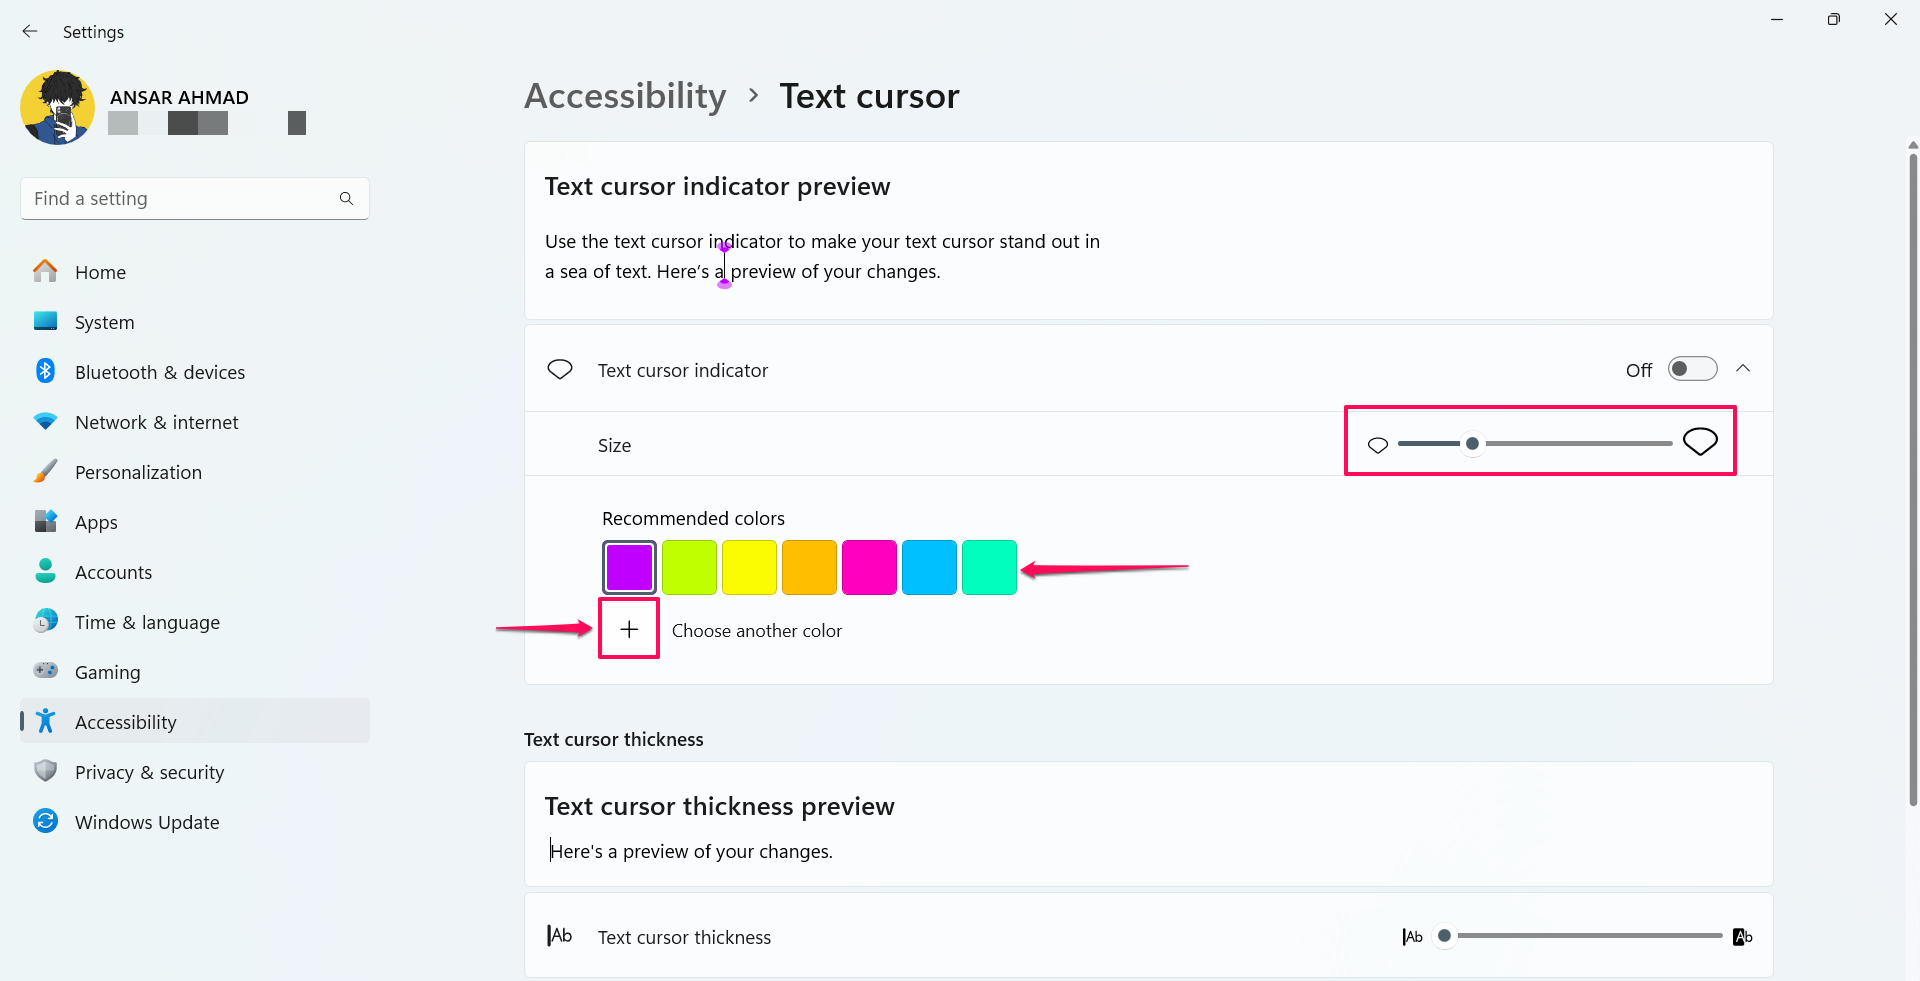
- Here, you can see the Text cursor indicator preview at the top. You will get the option to change the color and size of the text cursor.
- Drag the Size slide to the right side to increase the text cursor size. To decrease the size, drag the slider on the left side.
- You can select the color under the “Recommended colors” to change the text cursor color.
- Click on the “Choose another color” option if you want to select another color for the text cursor.
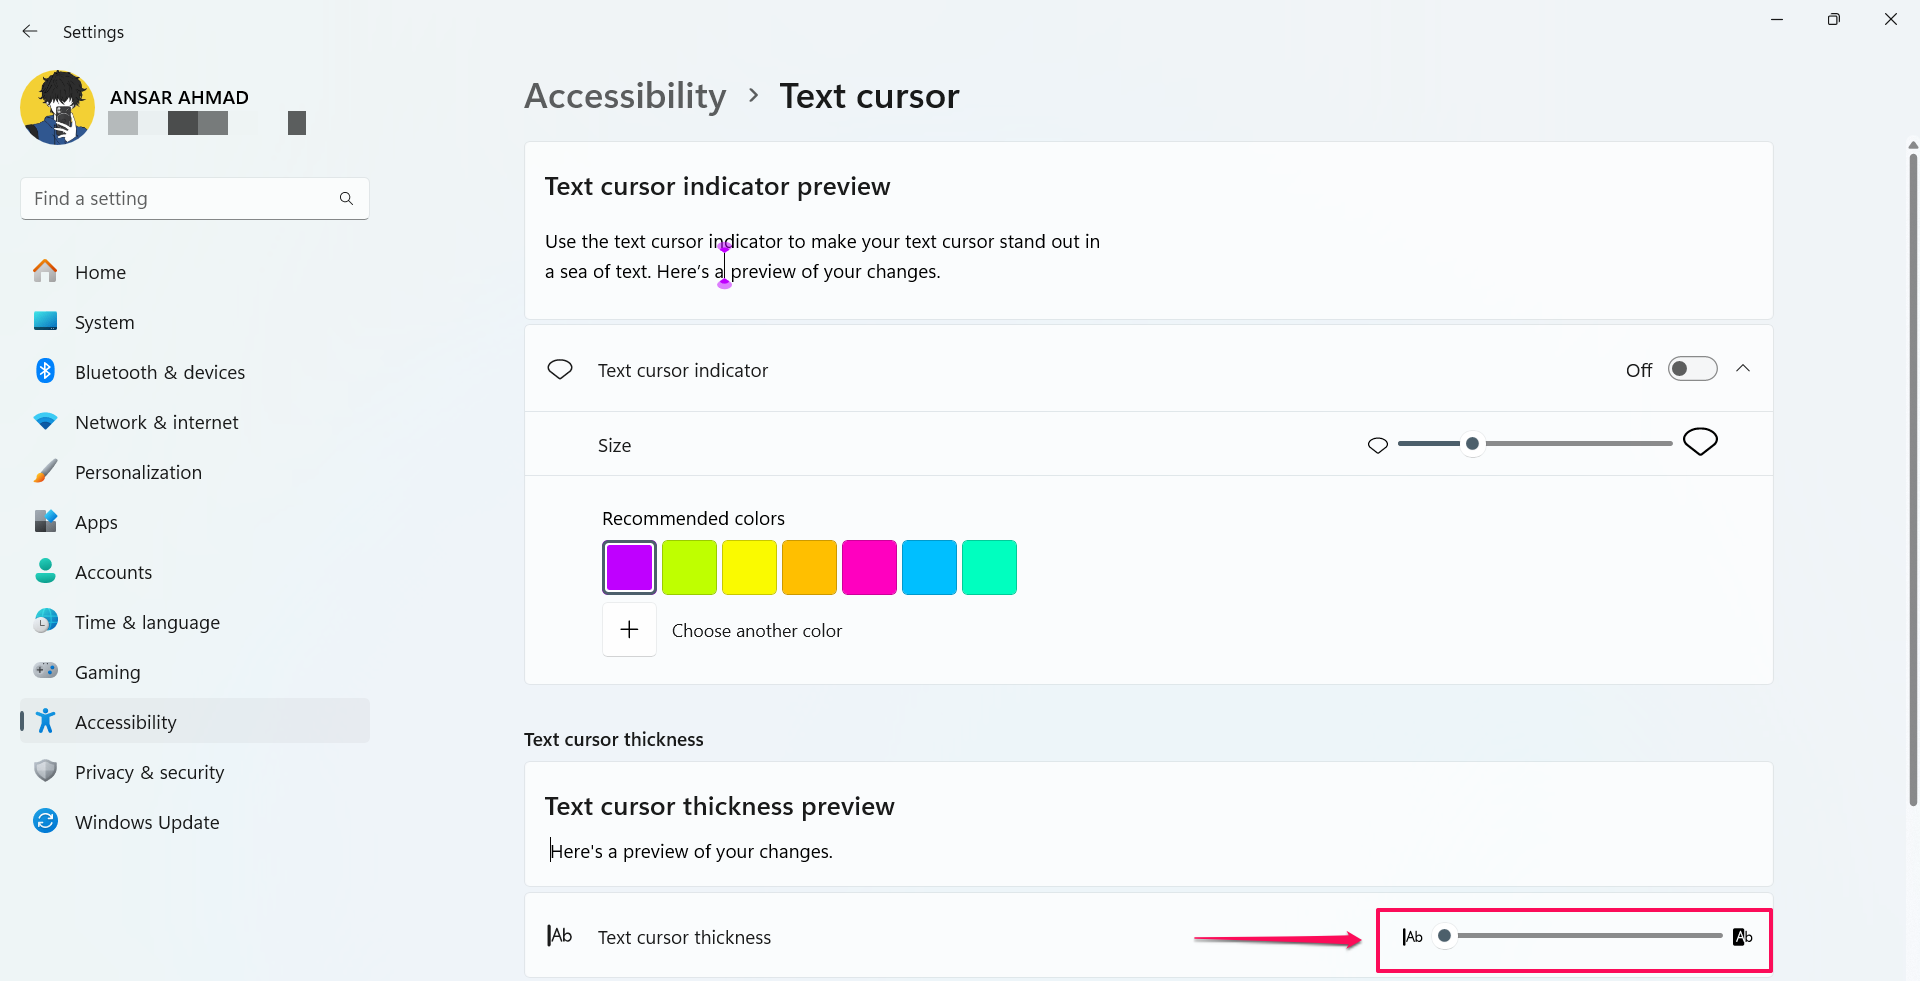
Furthermore, if you want to change the Text cursor thickness, then drag the slider to the right side. Now the cursor thickness will be increased.
Conclusion
That’s it. This is how you can easily change mouse cursor size, theme, and style in the Windows computer. Changing the cursor to a modern style, color, and size gives you a unique look to your Windows 11, especially while browsing the internet. In addition, you can change the text cursor color. Follow the above-mentioned steps to change the look of the mouse cursor and text cursor!
We hope you have found this article helpful. You can follow us on X (Formerly Twitter), Instagram, LinkedIn and our WhatsApp Channel to keep updated with us and the latest tech. Keep visiting GizmoGeek Hub, we are always happy to assist you and make your tech experience better!!


