The Recycle Bin is the place where all your deleted files are stored. You have access to either restore the files or permanently delete those files. But sometimes you may face an error concluding that the Recycle Bin on C:\ is corrupted or receive an Access Denied or a Corrupt Recycle Bin error message. This might be frustrating to you but don’t worry, you are at the right place as this article will assist you with the 6 easy fixes for this error.
The recycle bin can become corrupted on any version of the Windows operating system, but we’ll focus on Windows 10 and Windows 11 as these are the two most used versions and most likely to be affected.
Before going ahead with fixes, you can simply restart your PC as it might solve the issue. If it does not work then try the fixes below that will probably resolve the issue.
1. Repair Using CHKDSK Utility
CHKDSK is a system tool used to scan and fix system errors. You can run the CHKDSK tool using PowerShell or Command Prompt with a single command. You can follow the steps below.
Step 1: Click on the Start Button, then search and open Windows PowerShell. Or you can open the Command Prompt by
- either type ‘Command Prompt’ or ‘cmd’ in the start menu
- Alternatively, you can also press Win + R to open the Run box, type ‘cmd’ and hit enter.
All these processes will take you to the same menu, try anyone of your choice.

Step 2: In the next step, you have to type the following command and hit enter.
You have to replace the letter X in the below command with the drive you are facing the corrupted issue.
chkdsk X: /R

After that, wait for the process to be completed. CHKDSK will fix the errors if any. After that, you can restart your system and try accessing the Recycle Bin.
2. Run SFC to Repair Files
Just like CHKDSK, you can use SFC (System File Checker) to solve the issue. SFC can be used to scan and repair the files. It might take some extra time as instead of scanning and fixing issues in a single drive, SFC scans the entire system. The steps are as follows:
Step 1: Open the Command Prompt as mentioned above earlier.
Step 2: Now, type the following command and press enter.
sfc /scannow
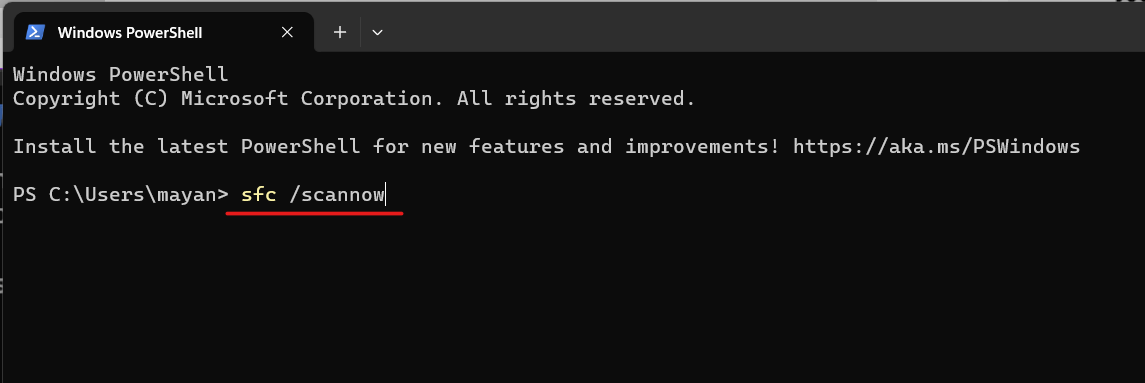
After this, let it do its work. Once done, restart your PC and check if the issue is resolved or not.
3. Uninstall and Reinstall the Recycle Bin
If the issue is still not resolved then you can try reinstalling the Recycle bin after deleting it. Follow the steps below to do so.
Step 1: Open File Manager and click on the three dots at the top right corner.
Step 2: Click on the Options (Gear Icon) as shown in the image.

Step 3: Select the view window to proceed.
Step 4: Here, you have to choose ‘Show hidden files, folders and drives’ under ‘Hidden files and folders.’ Also, you can refer to the image for better clarification.
Step 5: Once Done, you have to Click Apply and hit OK.

Step 6: Now, you have to type the following text in the address bar and hit enter.
C:\$Recycle.Bin

Step 7: Delete all the files and contents inside this folder and then restart your PC.
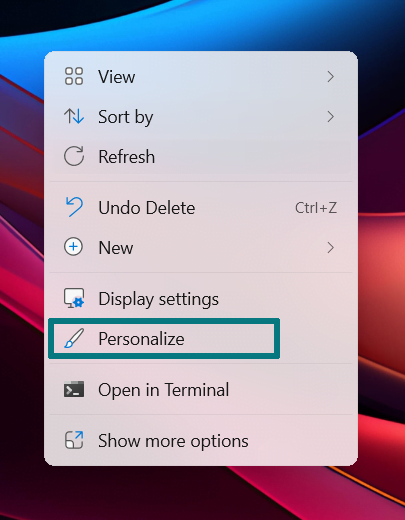
Step 8: After that, you have to right-click on your desktop and choose the Personalize option.
Step 9: Click on ‘Themes’.

Step 10: Now, Choose ‘Desktop icon settings’.

Step 11: Here, you have to click on the checkbox and enable Recycle Bin. If it is already enabled then click on the checkbox to disable it and then again enable it.
Step 12: Once you are done, Click Apply and press OK.

ALSO READ: How to Fix Wi-Fi Networks Not Showing Up on Windows 11: Easy Solutions
4. Reset Recycle Bin Using Command Prompt
If the issue still persists then you can try resetting the Recycle Bin using Command Prompt as this might fix the Recycle Bin on C/D is corrupted issue. Follow the steps below.
Step 1: You have to open the Command Prompt. You can open it using any one of the ways mentioned above.
Step 2: Then, enter the following command and hit Enter. Make sure to replace the letter X with the letter of the drive you’re facing the issue.
rd /s /q X:\$Recycle.bin

Step 3: After the completion of the process, just restart your Windows PC.
5. Scan Your PC for Viruses or Malware
Recycle Bin might face issues while deleting files when your computer is affected by malware. So, a good solution to fix a corrupted Recycle Bin is to check and remove any possible malware on the PC. Follow the steps below.
Step 1: Open Windows Security and click on ‘Virus & threat protection’.

Step 2: At this step, choose any scan options of your choice, the scan details are mentioned there.

Now, Windows Defender will scan your PC, if any threats and viruses are found then it will inform you and will ask you to remove them. Once done, restart your PC and check if you can access the Recycle Bin.
6. Try Restoring from a System Restore Point
You can try to restore your system from a previous system restore point. This solution might also help you so here are the following steps to do so.
Step 1: Use the Windows + R keys to open the Run application.
Step 2: Type the following text and hit Enter.
rstrui
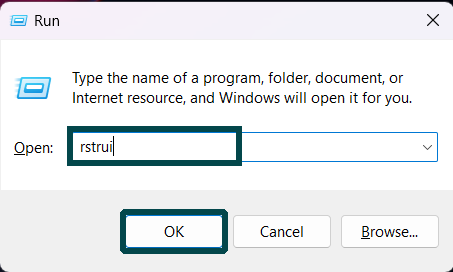
Step 3: Here, you have to choose the oldest restore point and click Next.

Step 4: Once you are done with the process, click Finish.
Conclusion
So, these were 6 easy ways to fix the Recycle Bin Corrupted Error on Windows 10/11 PC. We hope it was helpful to you and you were able to fix the issue. Please let us know which method worked for you in the comments. If you have any doubts or face any problems related to this issue, drop a comment below. Keep visiting GizmoGeekHub, We are always happy to assist you!
Also, You can follow us on X (Formally Twitter) and on Instagram to keep updated with us and the latest tech.
ALSO READ: How to Take a Screenshot in Windows 11 PC: 4 Easy Methods


