Creating a digital signature can make your documents and artwork look professional and personalized. In this guide, we’ll show you how to create a digital signature in Photoshop. Whether you’re a designer, photographer, or just need a custom signature, follow these simple steps to make your own digital signature.
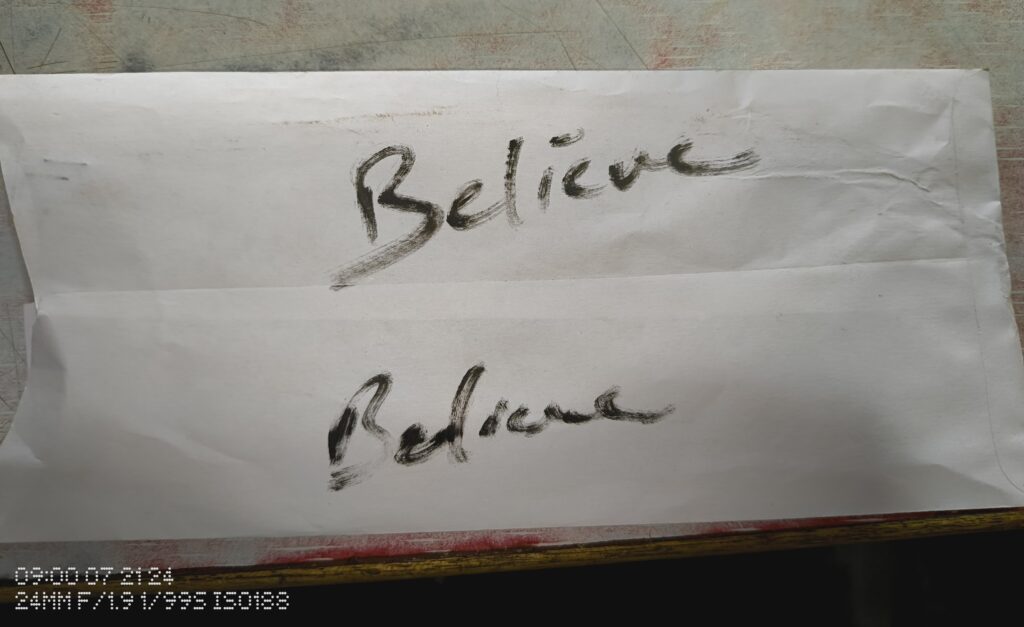
Sign on a blank white sheet of paper. Feel free to experiment, create a few different variants and later choose whichever you like the most.
Click a picture of the sheet and transfer it to your PC.
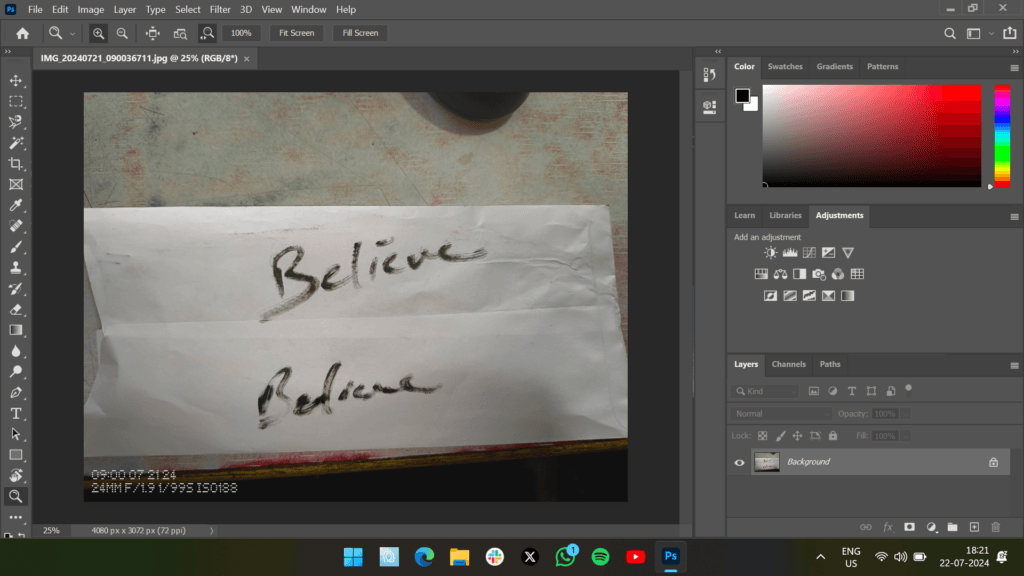
Open the picture in Photoshop.

Select the Crop tool and crop it to the desired dimensions just a little bit wider than each of the sides of the signature.

Now go to the Channels section situated here.

Select the Red channel, since it has the most amount of contrast.

Now click on this portion, which is for the curves, since we will have to work with these.
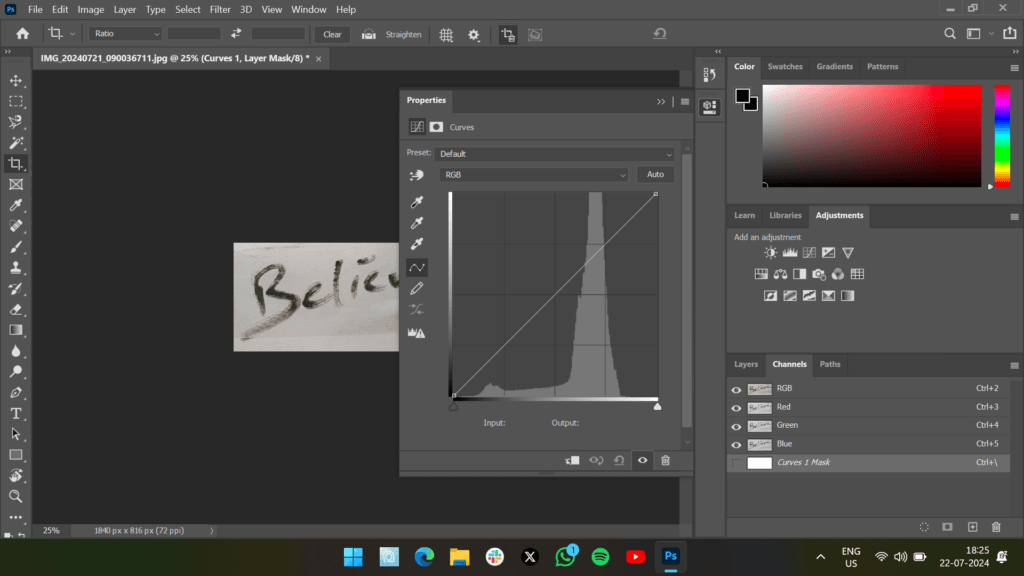
Click and hold the Alt key and bring the last slider to the point where the artifacts disappear, and the first slider roughly to the point where the black artifacts start to appear. Now click on the OK key.
Now go to the channels section again.

Now, while holding the Ctrl or the Command key, click on the red channel again. This selects the white portion of the image.


Now that we need the portion which hasn’t been selected, we will invert the selection by holding the Ctrl and Shift keys and pressing the I key. Now the black part has been selected.

Now, hit the W key on your keyboard, and point it right at the selected portion and click on the ‘layer via copy’ option.
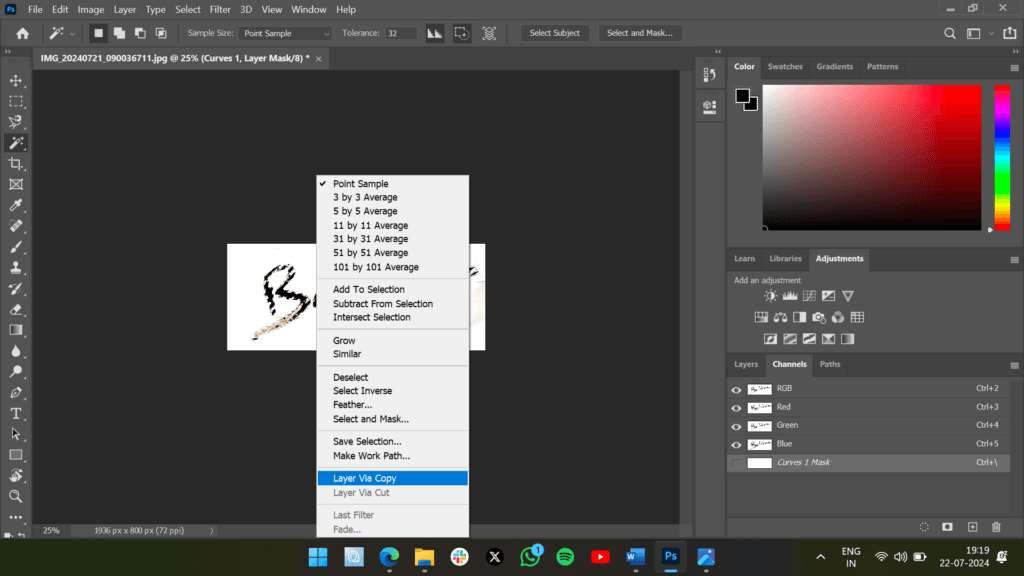
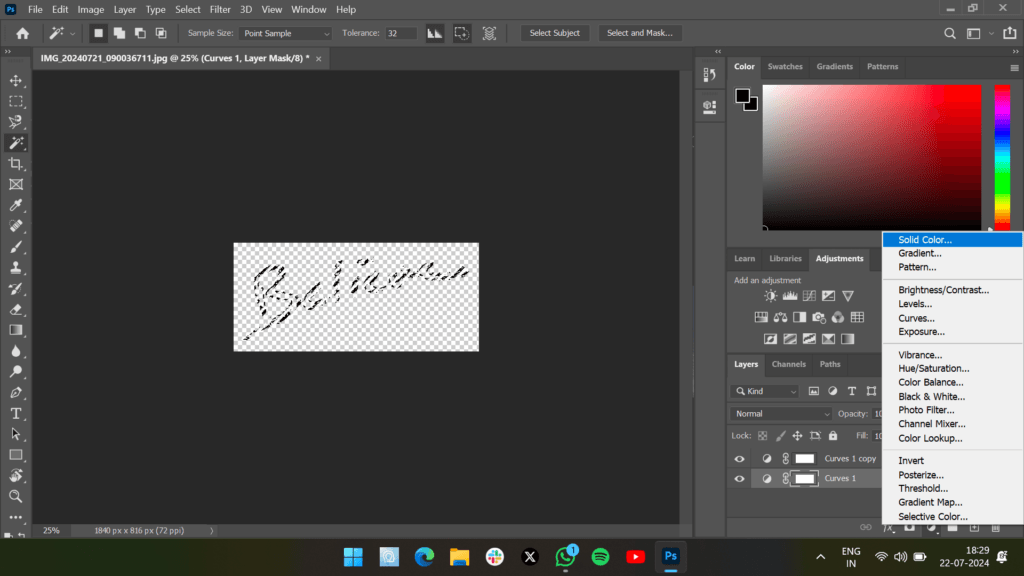
Now, go to the layers section and delete the background layer. Now you only have the outlines of the selected portion.

Now go to this option and select the Solid Color option in the popup menu.
Now you will see the color selection tool, in which you can choose any color of your choice. Here, I’ll choose black.
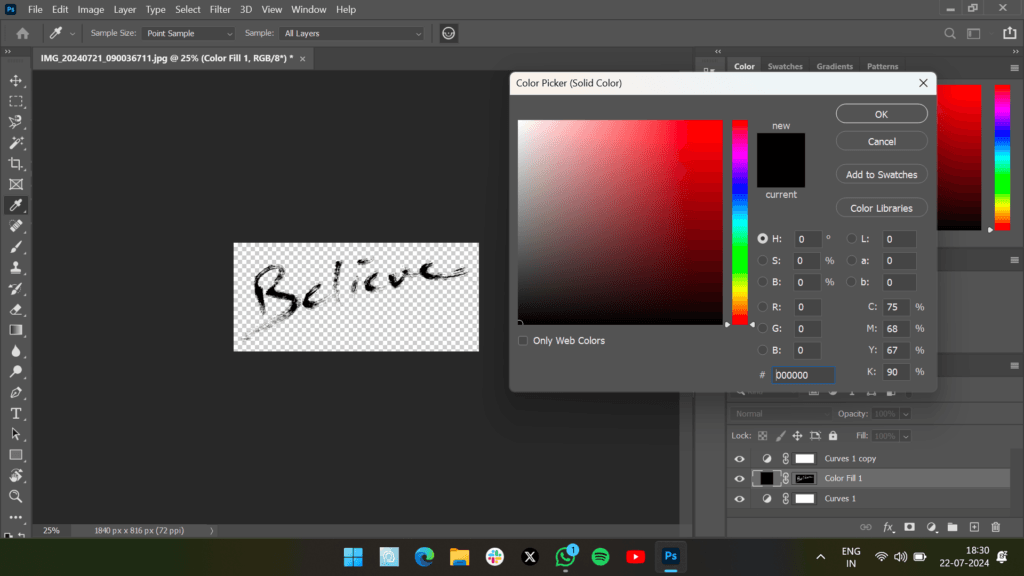
Now you have your very own Signature on a transparent background.

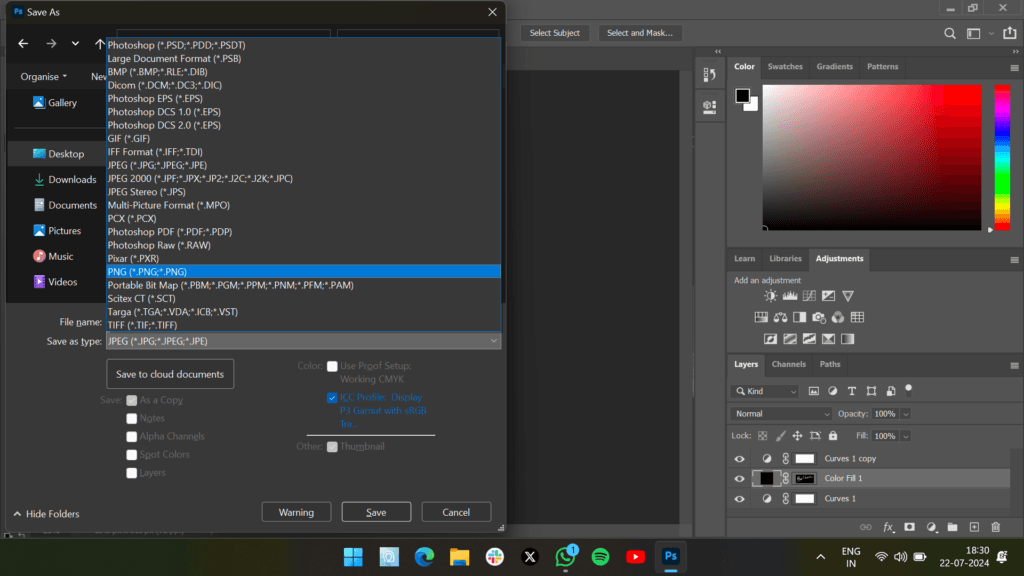
To save it in the most used format, hit the Ctrl + Shift + S on your keyboard. Rename it as you like and select the PNG option from the drop-down menu and clicking the Save button.
Now that you know how to create a digital signature in Photoshop, you can easily add a personal touch to your documents and artwork. This skill not only enhances the professionalism of your work but also adds a layer of authenticity. Practice these steps, and soon you’ll have a perfect digital signature ready to use whenever you need it.
We hope that this article was helpful to you.
Keep reading GizmoGeek Hub for more such articles.
You can follow us on X (Formerly Twitter), Instagram, LinkedIn and our WhatsApp Channel to keep updated with us and the latest tech.
Keep visiting GizmoGeek Hub, we are always happy to assist you and make your tech experience better!
Request – We are a new site and are solely dependent on the Ad revenue so we request you to not use any Ad blockers as it’s the only source of our income right now.

